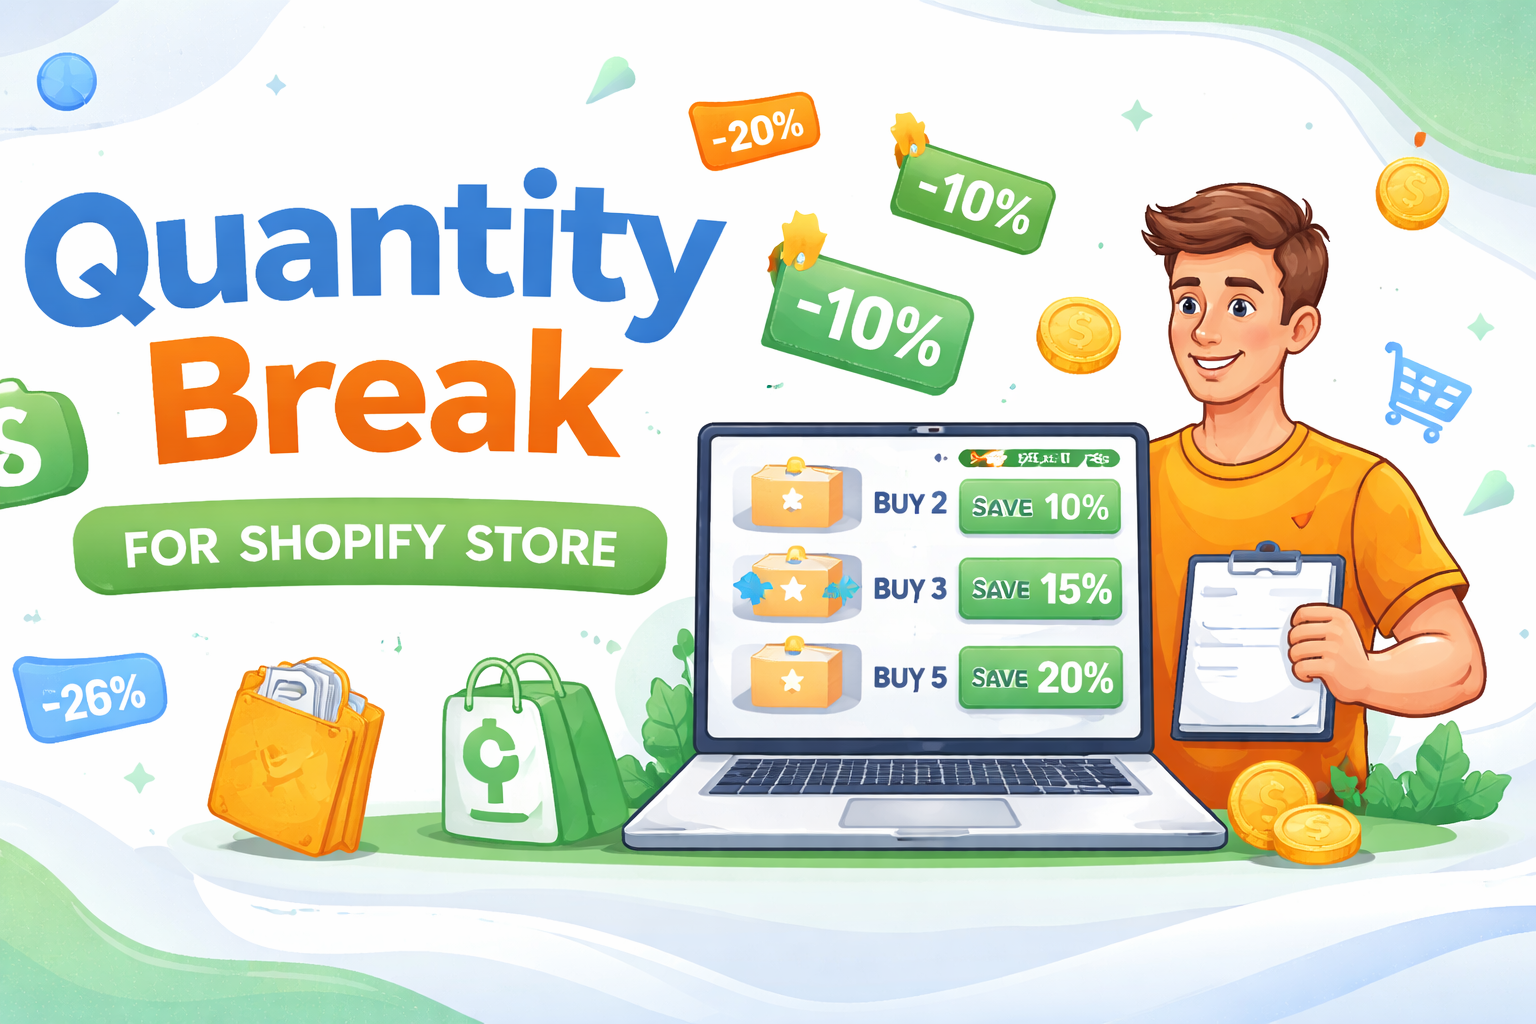
Quick Answer: How to Set Up Quantity Breaks on Shopify
To set up quantity breaks on Shopify in 2026, the fastest path on any paid plan is a third-party app built on Shopify Functions (live in under 10 minutes). Install the app, click Create offer, pick the products, configure three tiers (Buy 2 = 10% off / Buy 3 = 15% off “Most Popular” / Buy 5 = 20% off), drop the widget above the add-to-cart button in the theme editor, set Combinations to allow stacking with discount codes, publish, and verify in an incognito window.
The alternatives: Shopify automatic discounts (free, no product-page table, 25-discount store cap), manual discount codes (email-only), native B2B volume pricing (now on all paid plans since April 2026 — 3-catalog cap on non-Plus), or custom Shopify Functions (4–8 weeks of dev work).
What Changed in 2026 (Things Most Guides Got Wrong)
If you read a quantity-break tutorial written before April 2026, three of its core claims are now incorrect:
- Native B2B is no longer Plus-only. On April 2, 2026 Shopify rolled out company profiles, up to 3 catalogs, quantity rules, and volume pricing (up to 10 price breaks per product per variant) to every paid plan — Basic, Grow, Advanced, and Plus. Source: Shopify News, "B2B for All".
- The 25-discount cap includes Functions and apps. Shopify raised the automatic-discount limit from 5 to 25 in November 2024 — but that 25 is a combined total across native automatic discounts, app-based discounts, and Shopify Function discounts. Source: Shopify developer changelog.
- Shopify Plus pricing is $2,300–$2,500/month, not $2,000. $2,300 on a 3-year contract, $2,500 on a 1-year contract, plus 0.25% platform fee on monthly GMV above $1M. Older guides citing "$2,000+/mo" are out of date.
What Is a Quantity Break on Shopify?
A quantity break is a tiered pricing offer that reduces the per-unit price as a customer buys more units of the same product. Also called volume discounts, bulk discounts, tiered pricing, buy-more-save-more, or price breaks. They display as a pricing table on the product page (for example: 1 unit at $25, 3 units at $21.25 each, 5 units at $20 each) and apply automatically at checkout. New to the concept? Start with our explainer: what are quantity breaks?
For the strategy and AOV impact (we typically see 20–35% lifts on consumables in our app's data), see our guide to increasing sales with quantity breaks. This tutorial focuses on the setup itself.
Key Takeaways
- Five methods work in 2026. Third-party app, automatic discounts, manual codes, native B2B volume pricing (all plans), and custom Shopify Functions.
- Fastest setup: third-party app on Functions. Under 10 minutes from install to live on any paid plan, with a visible product-page pricing table.
- Native automatic discounts don't display on the product page. Customers see the discount only after items hit the cart — that kills the upsell.
- You're capped at 25 active automatic discounts store-wide. Apps and Functions count toward this cap.
- Native B2B volume pricing now works on every paid plan (since April 2, 2026). 3-catalog limit on non-Plus, unlimited on Plus.
- Always test in incognito before launch. Confirm the table renders on desktop + mobile, the discount applies at cart and checkout, and the final order in Admin shows the discount line.
Which Method Should You Use? (30-Second Decision Tree)
Pick the right path before you start clicking. From the stores I've worked with:
- DTC store, want it live today? → Method 1: Third-party app
- 1–2 products, strict $0 budget? → Method 2: Automatic discounts
- Running email or influencer campaigns? → Method 3: Manual codes
- Selling B2B / wholesale (any paid plan)? → Method 4: Native B2B volume pricing
- Bespoke discount logic + a developer? → Method 5: Custom Shopify Functions
For roughly 9 out of 10 DTC stores I work with, the answer is Method 1. The other 10% break down to: B2B sellers (Method 4) and teams with custom logic that no app supports (Method 5).
Pick Your Method by Store Scenario
The decision tree gives you the headline. These scenarios show the nuance — based on what's actually worked across the stores we've onboarded:
| Your Situation | Best Method | Why |
|---|---|---|
| New store, <10 products, $0 budget | Method 2 (Automatic Discounts) | Free, fine for a small catalog before you have traffic |
| Established DTC store, 20+ products, growing revenue | Method 1 (Third-party app) | Scales across SKUs; product-page display drives the AOV lift |
| Consumables / subscription (supplements, coffee, pet food) | Method 1 + subscriptions | Pair quantity breaks with subscribe & save in one widget |
| Apparel with size/color variants | Method 1 with mix-and-match | Customers combine variants toward a single tier |
| DTC + small B2B (under 3 wholesale catalogs) | Method 4 (B2B) + Method 1 (DTC) | Native B2B for wholesale (any paid plan), app for storefront |
| 500+ wholesale customers, complex pricing | Method 4 on Shopify Plus | Unlimited catalogs, partial payments, deposits, sales-rep scoping |
| Influencer or affiliate campaign | Method 3 (Manual codes) | Trackable per campaign |
| Region pricing, loyalty tiers, multi-step rules | Method 5 (Custom Functions) | Only path with that flexibility |
| International / multi-currency via Markets | Method 1 (Functions-based app) | Functions respect Markets and presentment pricing |
All 5 Methods Compared
| Method | Plan | Setup Time | Cost | Product-Page Display | Scales Across SKUs | Stacks With Codes | Best For |
|---|---|---|---|---|---|---|---|
| 1. Third-Party App | Any paid plan | <10 min | Free–$20/mo | Yes | Yes (counts toward 25-discount cap) | Yes (via Functions) | Most DTC stores |
| 2. Automatic Discounts | Any paid plan | 5 min/tier | Free | No | No (25 cap) | No (one auto-discount/cart by default) | 1–2 products |
| 3. Manual Codes | Any paid plan | 2 min/code | Free | No | No | N/A | Email campaigns |
| 4. Native B2B Volume Pricing | All paid plans (April 2026+) | ~30 min/catalog | Included | B2B store only | Yes within catalog | N/A | B2B / wholesale |
| 5. Custom Shopify Functions | Any paid plan | 4–8 weeks | Dev fees | Custom build | Yes (counts toward 25-cap) | Yes | Bespoke logic |
Method 1: Third-Party App on Shopify Functions (Fastest, Recommended)
Best for: Any DTC Shopify store on any paid plan that wants quantity breaks live in under 10 minutes with a visible pricing table on the product page.
Why it wins for DTC: Modern quantity-break apps (Oxify, Kaching, Pumper, Rapi, Wide Bundles) install as theme blocks, render a pricing table inside the buy box, apply discounts via Shopify Functions, and ship with analytics, A/B testing, and progress bars. Native Shopify gives you none of that on the DTC storefront.
Step-by-step (Oxify as the example — same flow for most apps)
- Install the app. Go to Oxify Bundles on the Shopify App Store and click Add app. Approve permissions when prompted. Admin path: Apps → Shopify App Store → search "Oxify".
- Open the app and start a new offer. Apps → Oxify Bundles → Create offer.
- Choose offer type. Select Quantity Breaks.
- Pick the products. Specific products, a collection, or all eligible products. Skip loss-leaders and any product under 40% gross margin.
- Configure three tiers. Tier 1: Buy 2, save 10%. Tier 2: Buy 3, save 15%, badge "Most Popular." Tier 3: Buy 5, save 20%. The 10/15/20 ramp is the most-tested in 2026 — competitors who recommend 5/10/15 are leaving conversion on the table, and 15/25/40 trains shoppers to wait for sales.
- Style and place the widget. Set colors and badge text to match your theme. In the theme editor (Online Store → Themes → Customize), drag the app's block into the product template below the variant selector and above the add-to-cart button. This placement matters — I'll explain why in the mistakes section.
- Set the Combinations rule. This is the setting most setups get wrong. In the offer settings, decide whether the tier combines with manual discount codes. If you allow shoppers to use coupons at checkout, set "Combine with product discount codes" to on. (Functions-based apps support stacking; older draft-order apps don't.)
- Enable the cart-drawer progress bar. "You're $12 from saving 20%" — this single string is worth 8–15% on AOV in our tests.
- Save and publish. The widget goes live on the selected products.
- Verify in incognito (mandatory). Open the product page in a private window, add 2 units, and confirm the discount applies in the cart drawer and at checkout.
Why apps beat native methods (the practical version)
- Visible on the product page. Native discounts only show at checkout. If your shopper doesn't know tiers exist when they hit add-to-cart, they bought one unit.
- No per-product configuration tax. One app offer can apply to a whole collection. Native automatic discounts force you to recreate the rule per product/variant.
- Stacks with discount codes (via Combinations). Customers can use a quantity break and an email coupon on the same order. Native auto-discounts can't do this.
- Analytics + A/B testing. Measure tier-level revenue and split-test thresholds. Native admin gives you neither.
- Mix-and-match. Customers combine variants (sizes, colors, flavors) toward a single tier.
- Markets-compatible. Functions respect multi-currency and presentment pricing.
For a full comparison of 10 apps (with verified pricing, ratings, and pros/cons), see our best quantity break apps for Shopify guide.
Method 2: Shopify Automatic Discounts (Free, Limited)
Best for: Stores with 1–2 products that want a quick free option and can live without a product-page pricing table.
The catch: The discount is invisible until cart/checkout. Most shoppers won't know it exists — which means most won't upgrade.
Step-by-step
- Admin: Discounts → Create discount.
- Select Amount off products.
- Choose Automatic discount (applies as soon as cart qualifies — no code).
- Title clearly. Example: "Buy 2, save 10%." The title appears in cart and checkout — make it the offer description, not internal notes.
- Set discount value: Percentage, 10.
- Applies to. Specific products or collections.
- Minimum requirements. Choose Minimum quantity of items → 2.
- Customer eligibility. All customers, unless restricting to a segment.
- Combinations. Decide if this auto-discount combines with product, order, or shipping discounts. Default is "No combinations" — change this if you want shoppers to also use codes.
- Active dates. Set start date. Optional end.
- Save. Repeat for tiers 2 and 3 (3 separate discounts).
Hard limits before you start
- 25 active automatic discounts max per store. Includes app-based and Function-based discounts. 10 products × 3 tiers = 30 rules → over the cap. Source: Shopify changelog.
- Only one automatic discount applies per cart by default. If two qualify, Shopify picks one — usually the larger. Enabling Combinations adds complexity.
- No product-page display. Shoppers learn about the discount only when items hit the cart.
- No analytics. Can't measure tier-level revenue or A/B test.
- Doesn't scale. 50 products with 3 tiers = 150 manual discount rules. Will not fit under the 25-discount cap.
Method 3: Manual Discount Codes
Best for: Email-only or influencer campaigns where you control the distribution of the code.
The catch: Customers must enter the code at checkout. Most won't, because they don't know it exists.
Step-by-step
- Admin: Discounts → Create discount.
- Select Amount off products → Discount code.
- Enter a code customers will remember. Example:
BUY3SAVE15. - Set discount value: 15% off.
- Applies to. Specific products or collections.
- Minimum requirements. Minimum quantity = 3.
- Save. Repeat for each tier.
- Distribute via email, post-purchase pages, or influencer briefs.
This is the weakest method for in-store conversion — the discount lives outside the product page entirely. Use it only when you have a controlled channel for delivering the code.
Method 4: Native B2B Volume Pricing (Now on All Paid Plans)
Best for: Any Shopify store running wholesale or B2B alongside (or instead of) DTC. This is the biggest change in 2026: Shopify opened native B2B features to every paid plan on April 2, 2026 — you no longer need Plus to get volume pricing.
What's included by plan
| Feature | Basic / Grow / Advanced | Plus |
|---|---|---|
| Company profiles | Yes | Yes |
| Custom catalogs | Up to 3 | Unlimited |
| Volume pricing (10 price breaks/product) | Yes | Yes |
| Quantity rules (min/max/increments) | Yes | Yes |
| Vaulted credit cards / payment terms | Yes | Yes |
| Direct catalog-to-company assignment | No | Yes |
| Partial payments & deposits | No | Yes |
| Sales rep permission scoping | No | Yes |
Source: Shopify News — B2B for All Plans.
Step-by-step (B2B volume pricing setup)
- Admin: Markets → Catalogs (note: the path moved here from Products in the Winter '26 edition).
- Create a catalog or open an existing one. Catalogs are assigned to specific B2B companies / company locations.
- Click Manage products and pricing.
- For each product, scroll to Volume pricing → click + Add quantity price breaks.
- Enter the minimum quantity + per-unit price (or % discount) for each break. Up to 10 price breaks per product per variant.
- (Optional) Set Quantity rules: minimum, maximum, or required purchase increments.
- Save the catalog. Assign it to the relevant companies/locations.
- (Optional) Bulk-import via CSV. Export the catalog, edit volume pricing in spreadsheet, re-import.
Limits to know
- B2B only. Volume pricing applies to catalog buyers, not your DTC storefront.
- No DTC product-page widget. Even on Plus, native volume pricing does not render a tier table on your retail product pages.
- 10 price breaks max per product per variant.
- Price becomes fixed once volume pricing is applied. Catalog-wide percentage adjustments won't apply on top.
- Lowest-price wins across catalogs. If a customer has multiple catalogs with the same product, Shopify displays the lowest price.
- 3-catalog limit on non-Plus. For 500+ wholesale customers, you'll hit the cap and need Plus.
Running DTC + B2B at the same time
This is the most common setup I see: a Shopify store selling both wholesale and direct. Run two parallel systems:
- B2B (this method): Native volume pricing in catalogs for wholesale buyers. Works on any paid plan, up to 3 catalogs.
- DTC (Method 1): A third-party app for storefront tier display.
They don't conflict — B2B catalog pricing applies only to logged-in B2B buyers, the app applies only to the public storefront.
Method 5: Custom Shopify Functions (Developer Path)
Best for: Teams with bespoke discount logic that no off-the-shelf app supports — region pricing, multi-step conditional tiers, loyalty mechanics, etc.
Time investment: 4–8 weeks including build, testing, App Review (for public apps), and deploy.
What Shopify Functions are (and the language tradeoff)
Shopify Functions is the platform API for writing custom checkout logic that runs natively at cart evaluation. Functions are written in any language that compiles to WebAssembly — officially supported: Rust and JavaScript (TypeScript via JS). Rust is roughly 3x faster at runtime than JavaScript, per Shopify's own benchmarks. For public apps or computationally heavy logic, write in Rust; for prototypes or simple logic, JS is fine.
Step-by-step (developer workflow, current as of May 2026)
- Install Shopify CLI.
npm install -g @shopify/cli@latest(single package — older guides referencing@shopify/themeas a separate install are out of date). - Set up a Shopify Partner account. Required to deploy Functions.
- Scaffold a new app.
npm init @shopify/app@latest - Generate a Function extension.
shopify app generate extension→ select Function → select Product discount. - (Rust path) Install Rust via rustup and add the WebAssembly target:
rustup target add wasm32-wasip1 - Edit the Function source. Open
extensions/<your-function>/src/run.rs(Rust) orsrc/run.js(JavaScript). Implement quantity-tier logic. - Test locally.
shopify app function runexecutes against a sample input. - Deploy.
shopify app deploy - Create an automatic discount that uses the Function. Admin: Discounts → Create discount → select your Function from the list.
- Set Combinations. Decide whether this Function discount combines with product codes / order discounts / shipping.
- Test in incognito + on real orders. Functions affect checkout production — exhaustive QA before flipping live.
Example: Tiered discount Function (Rust)
// extensions/tiered-discount/src/run.rs
use shopify_function::prelude::*;
use shopify_function::Result;

#[shopify_function_target(query_path = "src/run.graphql", schema_path = "schema.graphql")]
fn run(input: input::ResponseData) -> Result<output::FunctionRunResult> {
    let mut discounts = vec![];

    for line in input.cart.lines.iter() {
        let qty = line.quantity;

        let pct: Option<f64> = match qty {
            q if q >= 5 => Some(20.0),
            q if q >= 3 => Some(15.0),
            q if q >= 2 => Some(10.0),
            _ => None,
        };

        if let (Some(p), output::CartLineTarget::ProductVariant(variant)) =
            (pct, line.merchandise.clone())
        {
            discounts.push(output::Discount {
                targets: vec![output::Target::ProductVariant(
                    output::ProductVariantTarget {
                        id: variant.id,
                        quantity: None,
                    },
                )],
                value: output::Value::Percentage(output::Percentage { value: Decimal(p) }),
                message: Some(format!("Buy {} save {}%", qty, p as i32)),
            });
        }
    }

    Ok(output::FunctionRunResult {
        discounts,
        discount_application_strategy: output::DiscountApplicationStrategy::All,
    })
}
That's the core tier logic. A production build needs input validation, target-product filtering, and a test suite (cargo test in Rust). The official Shopify Functions discount tutorial walks through the full configuration.
Important Functions limits
- 25 active Function-based automatic discounts per store (raised from 5 in November 2024). Each Function counts as one — design tier logic to handle multiple use cases inside a single Function rather than spawning many.
- Instruction limit per Function call. JS Functions hit this sooner than Rust. Keep loops bounded; avoid recursive structures.
- Cold start latency. First invocation per session has ~50–100ms overhead.
When to actually take this path
Only when off-the-shelf apps can't express your logic. For 95% of stores, a third-party app on Functions (Method 1) gets you to the same outcome in 10 minutes instead of 6 weeks.
7 Setup Mistakes I See Constantly
These are the failure modes that show up in our support tickets and App Store reviews across the category — not theory, real recurring issues.
- Discounts steeper than gross margin allows. A 40% top tier on a 30% margin product loses money on every extra unit. Cap your top tier at (Gross margin %) − 15 percentage points. Use the Oxify Bundle Calculator to model COGS + shipping + payment fees + ad spend per tier.
- Pricing table below add-to-cart. If it's not in the first viewport on mobile, the shopper bought one unit before they knew tiers existed. Test at 375px width in Chrome DevTools.
- Overlapping automatic discounts. If two automatic discounts qualify on the same cart, Shopify picks one — usually the larger. The customer who expected the smaller one feels cheated.
- Wrong Combinations setting. The single most common cause of "the discount disappears when I add my coupon code" tickets. Decide once per offer whether tiers stack with codes, document the policy.
- Skipping the duplicate-theme test. App widgets sometimes conflict with custom theme CSS. Duplicate the live theme, install the widget there, and only publish after testing both desktop and mobile.
- Not testing on a real phone. Chrome DevTools mobile mode catches 90% of issues. The last 10% — tap targets, real-device font rendering, scroll behavior in cart drawer — only show up on a phone. 70%+ of Shopify traffic is mobile; this matters.
- Skipping the verification flow. Adding 2/3/5 units to a cart in an incognito window takes 90 seconds. Skipping it costs the cost of every refund and support ticket from broken orders. Do it before every offer launch.
How to Migrate From Native Discounts to a Quantity Break App
This is the most stress-tested migration path I have. We've moved dozens of stores from native automatic discounts to app-based tiers without losing a single order:
- Audit your existing automatic discounts. Screenshot or export every active rule.
- Install the new app, configure but don't publish anything yet.
- Disable (don't delete) your existing automatic discounts. Discounts → click each → set Inactive. Disabled discounts can be re-activated if you need to revert.
- Configure the app to match your old tiers exactly. Same products, same thresholds, same discount percentages.
- Publish to one test product first. Pick the lowest-traffic SKU you have a quantity break on. Verify in incognito for 24 hours.
- Expand gradually. Add 5–10 products per day to the app's coverage. Watch your support inbox for issues.
- Wait one clean week. Only delete the disabled native discounts after a full week of clean app data. This is your rollback safety net — don't burn it.
Why this order matters: running both systems live simultaneously without disabling the natives causes double-discounting or unpredictable cart math. Disabling (not deleting) gives you the rollback option.
10-Point Pre-Launch Checklist
I run this every time before publishing a new quantity break. Skip it and you'll find broken tiers in production within an hour.
- ☐ Margin math is positive at every tier. COGS + shipping + payment fees + ad-spend allocation tested against tier price. Net stays above 15% of selling price.
- ☐ Tier thresholds match your basket data. Tier 1 sits one unit above the most common basket size (from Shopify Analytics → Reports → Units per order).
- ☐ Pricing table renders inside the buy box. Below variant selector, above add-to-cart.
- ☐ Mobile placement is in the first viewport at 375px. No scroll required to see tiers.
- ☐ Middle tier is visually anchored. "Most Popular" badge or contrasting background on the target tier.
- ☐ Discount applies in cart and at checkout. Tested in incognito at tier 1, 2, and 3 quantities.
- ☐ Combinations behavior is intentional. Decided whether tiers stack with manual codes; setting matches that decision.
- ☐ Within the 25-discount cap. Active automatic + app + Function discounts total ≤ 25.
- ☐ Analytics tracking confirmed. GA4 / Shopify Analytics events fire on tier selection.
- ☐ Support team briefed. Customer service knows the offer and can answer "why is my discount X?" tickets.
How to Verify It's Working (3-Step QA)
Do these in order, in an incognito window. Takes about 90 seconds total.
Check 1: Product page
- Open the product page in a private browser.
- Confirm the pricing table is visible without scrolling on desktop.
- Resize to 375px in Chrome DevTools mobile mode — confirm visibility.
- Check tier prices, badges, and savings match what you configured.
Check 2: Cart
- Add the tier-1 quantity to cart. Confirm tier 1 discount appears in the cart drawer.
- Update to tier 2 quantity. Confirm tier 2 overrides tier 1.
- Update to tier 3. Confirm tier 3 applies.
- Cart line item shows the discount amount with a savings message.
Check 3: Checkout + order
- Proceed to checkout with tier 2 quantity.
- Confirm the discount appears in the order summary.
- Place a test order using Shopify Bogus Gateway (Settings → Payments → Manage manual payment methods).
- Open the order in Admin → Orders. Discount line item is recorded with the correct amount.
Troubleshooting: 7 Real Issues + Fixes
1. "The discount isn't applying in the cart"
- Confirm the product is inside the offer's product/collection scope.
- Offer is published and active (not scheduled).
- Cart meets the minimum quantity threshold.
- Using automatic discounts? Another auto-discount may be blocking yours — only one applies per cart by default.
- Check your store-wide active-discount count is under 25.
2. "The pricing table isn't showing on the product page"
- Open the theme editor → confirm the app's block is added to the product template.
- Custom theme? Block may need manual placement — most app docs include a snippet for legacy themes.
- "Theme app embeds" is enabled in theme settings.
- Clear browser + CDN cache.
3. "Widget breaks on mobile"
- Test at 375px in Chrome DevTools.
- Overflowing? Check theme container padding and widget max-width.
- Text wrapping awkwardly? Shorten badge labels, reduce padding.
4. "Two discounts conflict at checkout"
- Native automatic discounts allow one per cart by default — Shopify picks the larger.
- To stack a tier with a manual code, set Combinations to allow product discount codes — Functions-based apps support this.
5. "Order analytics don't match app dashboard"
- App analytics measure tier-attributed revenue. Shopify Analytics measures total order revenue.
- Refunds may not deduct from app analytics in real time.
- Cross-reference both — Shopify is GAAP source of truth.
6. "Discounts not applying for Markets / international customers"
- Confirm the discount uses Shopify Functions — Functions respect Markets and presentment pricing.
- Legacy draft-order apps don't play well with Markets. Switch to a Functions-based app.
- Test from a VPN in the target market to reproduce.
7. "Theme conflict — widget styling looks broken"
- Premium themes sometimes inject CSS with
!importantthat overrides app widgets. - Most apps include a "custom CSS" field — use higher-specificity rules.
- Open a support ticket with the app team — most resolve theme-specific styling within 24 hours.
Advanced Setups
Bulk-importing tier rules via CSV
For native B2B volume pricing (all plans), Markets → Catalogs supports CSV export/import — edit volume pricing in a spreadsheet, re-import. For standard discounts, Shopify Admin has no CSV import for discount rules. Some third-party apps (OC Quantity Breaks, Pareto) ship CSV import for tier rules — useful when you have hundreds of products with unique tier ladders.
Shopify Markets + multi-currency
Functions-based quantity break apps automatically respect Shopify Markets, multi-currency, and presentment pricing. A "Buy 3 save 15%" tier works identically in USD, EUR, and JPY. Avoid apps using legacy draft-order workarounds — they tend to break across currencies. Verify your chosen app's listing explicitly says "Built on Shopify Functions."
Running DTC + B2B on the same store
The setup I'd build on a non-Plus store:
- B2B (wholesale buyers): Native volume pricing in catalogs (Method 4). Up to 3 catalogs on non-Plus, unlimited on Plus. Up to 10 price breaks per product per variant.
- DTC (retail storefront): Third-party app on Shopify Functions (Method 1) with product-page widget, A/B testing, and analytics.
These don't conflict — B2B applies only to logged-in B2B buyers, the app applies only to the public storefront.
Targeting customer segments
Both Shopify automatic discounts and most quantity break apps support customer segmentation:
- VIP customers (lifetime spend over a threshold)
- First-time buyers (encourage larger initial baskets)
- Subscribers (combine with subscribe & save)
- Region (high-margin geographies get steeper tiers)
Frequently Asked Questions
How do I set up quantity breaks on Shopify?
There are five working methods: (1) a third-party app on Shopify Functions, (2) Shopify automatic discounts, (3) manual discount codes, (4) native B2B volume pricing — now on all paid plans since April 2026, and (5) custom Shopify Functions development. For most DTC stores, a third-party app on Functions is the fastest: live in under 10 minutes with a product-page pricing table no native method provides.
Does Shopify have built-in quantity breaks?
Shopify does not have a dedicated quantity-breaks feature for DTC. You can approximate it using automatic discounts with minimum-quantity conditions, but there's no product-page pricing table and the store is capped at 25 active automatic discounts (including app and Function-based ones). Native B2B volume pricing — up to 10 price breaks per product per variant — is now available on every paid plan (as of April 2, 2026), but applies only to B2B catalogs.
Can I create quantity breaks without an app?
Yes. Go to Shopify Admin → Discounts → Create discount → Amount off products. Choose Automatic discount, set a minimum quantity, and apply. This works for 1–2 simple offers, but the discount is invisible on the product page (shows at cart/checkout only), capped at 25 store-wide, and only one applies per cart by default.
How long does it take to set up quantity breaks?
Under 10 minutes with a third-party app on Shopify Functions. About 5 minutes per tier per product with Shopify automatic discounts. ~30 minutes per catalog with native B2B volume pricing. 4–8 weeks with custom Shopify Functions development including testing and App Review.
Do I need Shopify Plus to set up quantity breaks?
No. Since April 2, 2026, Shopify opened native B2B features — company profiles, up to 3 catalogs, quantity rules, and volume pricing — to all paid plans. Plus is required only for unlimited catalogs, direct catalog-to-company assignment, partial payments, deposits, and sales-rep permission scoping. Every other quantity break method works on every paid plan.
How do I display quantity breaks on the product page?
Native Shopify discounts do not display on the product page — they only show at cart and checkout. To show a pricing table on the product page, install a third-party app that includes a theme app extension (block). In the theme editor, drop the block below the variant selector and above the add-to-cart button.
Can quantity breaks be combined with other discounts?
Depends on the method and the Combinations setting. Native automatic discounts allow only one per cart by default. Apps built on Shopify Functions can stack with manual discount codes — set Combinations to "Combine with product discount codes" on the offer.
How do I verify my quantity break is working?
Open the product page in incognito, add the tier-1 quantity to cart, confirm the discount applies in the cart drawer and at checkout. Repeat for tiers 2 and 3. Resize to 375px (Chrome DevTools mobile mode) — pricing table must be in the first viewport. Place a test order with Shopify Bogus Gateway and confirm the discount line item in Admin → Orders.
What is the difference between Shopify quantity rules and quantity breaks?
Quantity rules set minimum, maximum, or increment-based purchase requirements (must buy in packs of 4). Quantity breaks set tiered per-unit discounts based on quantity (Buy 3, save 15%). They work together inside Shopify B2B catalogs — e.g., minimum 10 units (rule) with 10/15/20% discounts at 10/25/50 units (price breaks).
Is there a limit to how many quantity break rules I can have?
Yes. Shopify caps the store at 25 active automatic discounts — including those created by apps and Shopify Functions. The cap was raised from 5 to 25 in November 2024. Each Functions-based app offer counts individually. Design your tier structure with this cap in mind, especially if you run multiple discount apps.
How much does Shopify Plus cost in 2026?
Shopify Plus starts at $2,300/month on a 3-year contract or $2,500/month on a 1-year contract. Above $1M monthly GMV, Shopify applies a 0.25% platform fee on revenue beyond that threshold. Note: Plus is no longer required for native B2B quantity breaks — those moved to all paid plans on April 2, 2026.
Do quantity breaks work with Shopify Markets and multi-currency?
Yes — if the discount uses Shopify Functions. Functions respect Shopify Markets, multi-currency, and presentment pricing automatically. Legacy draft-order apps often break across currencies. For international stores, verify the app's listing says "Built on Shopify Functions."
How do I migrate from native Shopify discounts to a quantity break app?
Disable (don't delete) your existing automatic discounts. Install the app, configure tiers to match your old rules, publish to one low-traffic test product. Verify in incognito for 24 hours. Expand coverage gradually. Permanently delete the old auto-discounts only after one full clean week of app data — that's your rollback safety net.
Sources & Further Reading
All facts in this guide were cross-checked against Shopify's official documentation in May 2026:
- Shopify News: B2B for All Plans (April 2, 2026 announcement)
- Shopify Help: Discount types
- Shopify Help: B2B quantity rules & volume pricing
- Shopify developer changelog: Increased limits for automatic Function-based discounts (25 cap)
- Shopify Dev: About discounts
- Shopify Dev: Build a Discount Function
- Shopify Dev: Discount Function API reference
- Shopify Dev: Functions language considerations (Rust vs JS)
- @shopify/cli on npm (current install command)
- Internal: Best Quantity Break Apps for Shopify (2026)
- Internal: How to Increase Sales with Quantity Breaks